Connecting boneIO ESP
How to add a boneIO ESP controller to Home Assistant through the ESPHome integration.
boneIO ESP controllers run ESPHome and connect to Home Assistant with its own fast protocol (the ESPHome API). No MQTT is needed, and no broker either.
Adding the controller
-
Connect the boneIO ESP controller to the network and to power. After a moment Home Assistant finds it by itself.
-
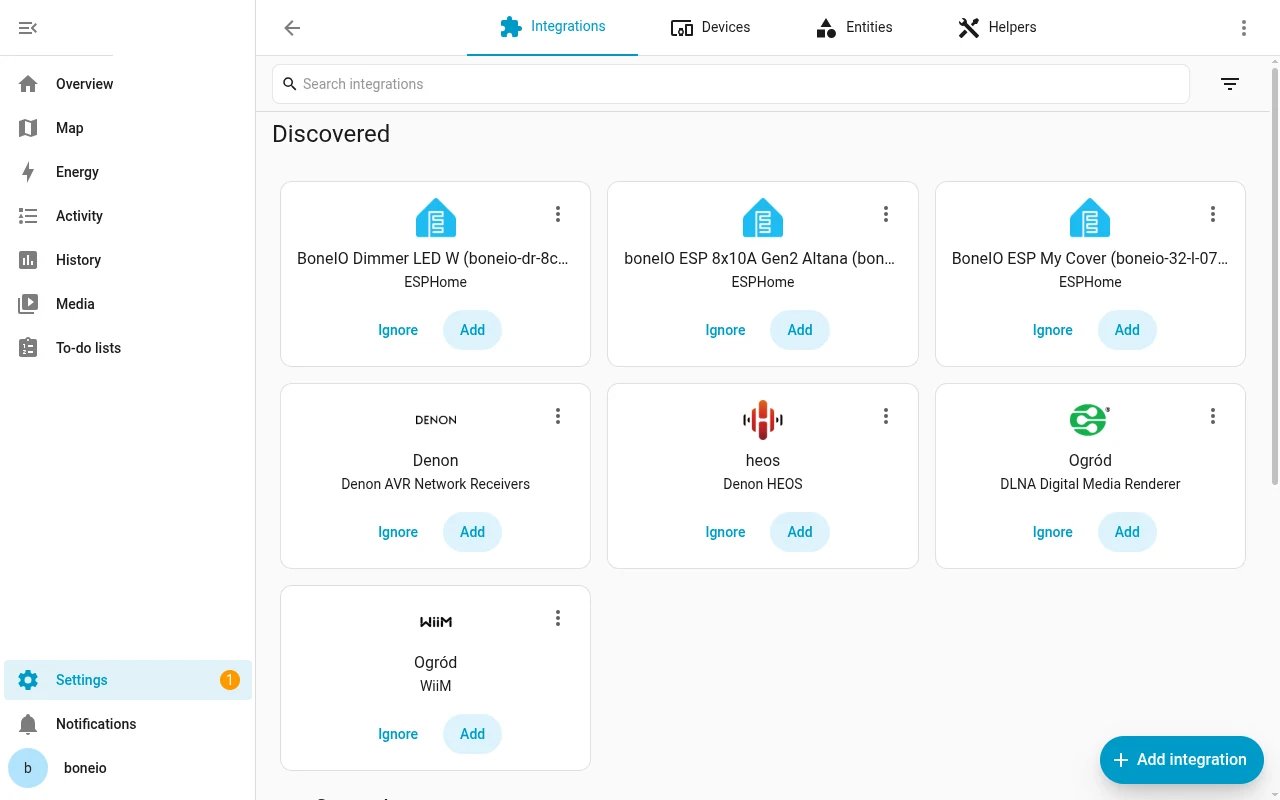
Go to Settings → Devices & services. Under Discovered, the controller has an ESPHome tile with its name, e.g. "boneIO ESP 8x10A Gen2".
-
Click Add on the controller and confirm.
-
If Home Assistant asks for an encryption key, enter the key from the
api:section of the controller's configuration. A controller with the boneIO factory configuration has no key, and this step does not appear. -
Assign the controller to an area and click Finish.
If the controller is not under Discovered, add it by hand: Add integration → ESPHome, with the controller's IP address (from the device list in your router). Discovery needs Home Assistant and the controller on the same network.
What you see in Home Assistant
The controller's page under Devices & services → ESPHome shows its outputs, inputs and sensors as entities, ready for dashboards and automations.
Editing the controller's configuration
The controller's configuration (output names, button actions) is changed in ESPHome Device Builder, an app for Home Assistant or a program on your computer. See Connecting to boneIO ESP.
Actions set up in the boneIO ESP configuration (button → light) run in the controller itself, also while Home Assistant is off.