How to install Home Assistant?
What are the ways to install HA?
Home Assistant (HA) can be installed in several different ways, depending on your hardware and level of experience. We will not list all methods here - we will focus on the two that we recommend ourselves and briefly explain why it is worth choosing these specific ones.
1. HAOS Generic Installation (Recommended)
What does this mean in practice? It is nothing more than installing the Home Assistant Operating System directly on the hard drive of your server (e.g., a Dell Wyse terminal, HP T630, or a dedicated mini-PC).
HAOS is a minimalist, extremely stable operating system designed exclusively to run the Home Assistant ecosystem.
- Advantages: Highest performance, simplicity of use, full support for Add-ons, and automatic updates of the entire environment.
- For whom: For people who want a dedicated device just for their smart home.
2. HAOS Installation as a Virtual Machine (e.g., Proxmox)
This is a method that offers much greater possibilities but requires more technical knowledge. It consists of installing HAOS as a virtual machine (VM) inside another management system (the so-called hypervisor), such as Proxmox VE.
- Advantages: Allows you to run many other systems on one physical computer (e.g., NAS, file server, Plex) alongside Home Assistant. It enables instant "snapshots," which allow you to revert the system to its state before a failure in a few seconds.
- For whom: For advanced users with more powerful hardware.
Installing HAOS Generic x86-64 – Step-by-Step Instructions
Step 1: Preparing the installation media
The installation of Home Assistant is somewhat unusual. This system does not have a classic "Next -> Next" installer. According to the official documentation, we will use the Ubuntu LiveCD system to "flash" the Home Assistant image directly onto the target computer's drive.
What will be needed?
- A computer that will become your HA server (x86-64 architecture).
- A USB flash drive (minimum 8GB, 32GB recommended).
- A second computer with Windows to prepare the flash drive.
Preparing the flash drive with Ubuntu
-
Connect the flash drive to the computer.
-
Download the latest version of Ubuntu Desktop from ubuntu.com/download/desktop.
-
Download the Rufus program from rufus.ie.
-
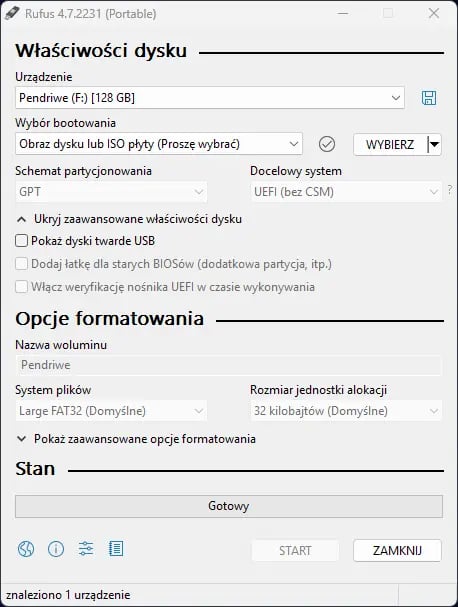
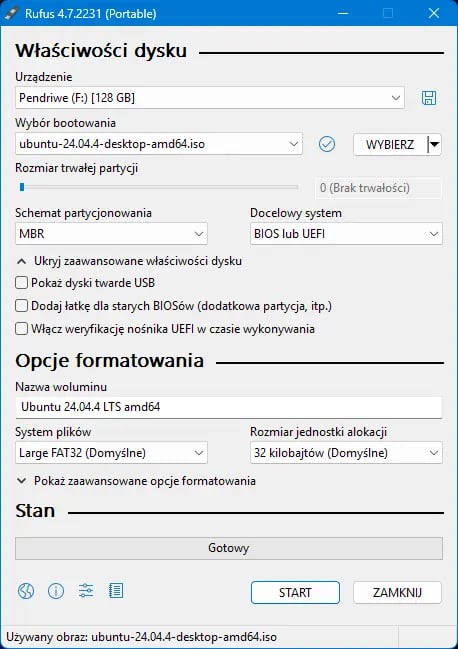
Run Rufus:
-
In the Device section, select your flash drive. (NOTE: Make sure you choose the correct media – the process will delete all data from it!).
-
In the Boot selection section, click the SELECT button and point to the downloaded Ubuntu ISO image.
-
Click START.
-
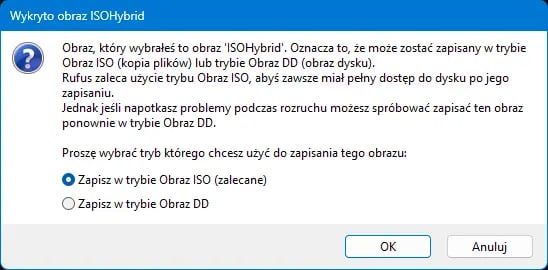
If a message about an "ISO Hybrid Image" appears, select the recommended option and click OK.
-
Confirm the data loss warning message.

-
-
Wait until the progress bar reaches the end (this may take up to 10 minutes). When you see the status READY, close the program with the CLOSE button.
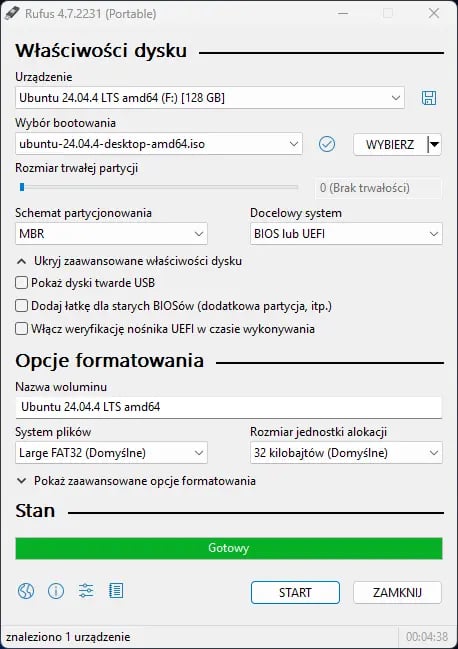
Done! The flash drive is prepared!
Step 2: Hardware preparation (Hardware x86-64)
Now we need to prepare the computer on which Home Assistant will ultimately run.
- Connect the prepared flash drive to the target server.
- Start the computer and immediately start pressing the BIOS/UEFI entry key (usually 'F2', 'Del', 'F1', or 'F10').
- Important BIOS settings:
- Make sure UEFI Boot is enabled.
- Disable the Secure Boot option.
- In the Boot Order section, set the flash drive as the first boot device.
- Save the changes (usually the
F10key) and restart the computer.
Step 3: Flashing the HAOS image using Ubuntu
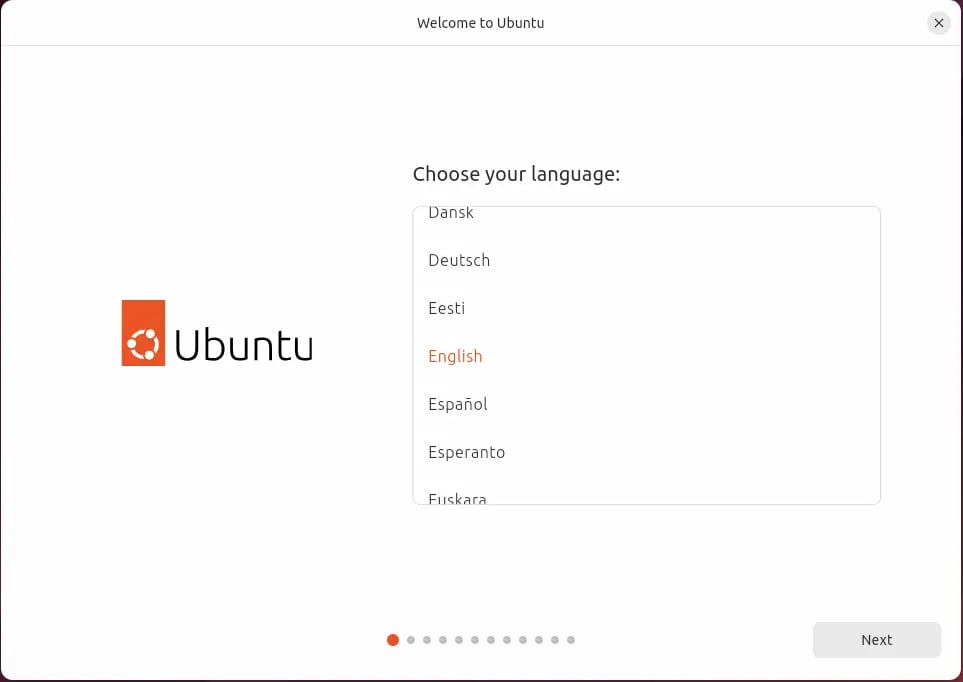
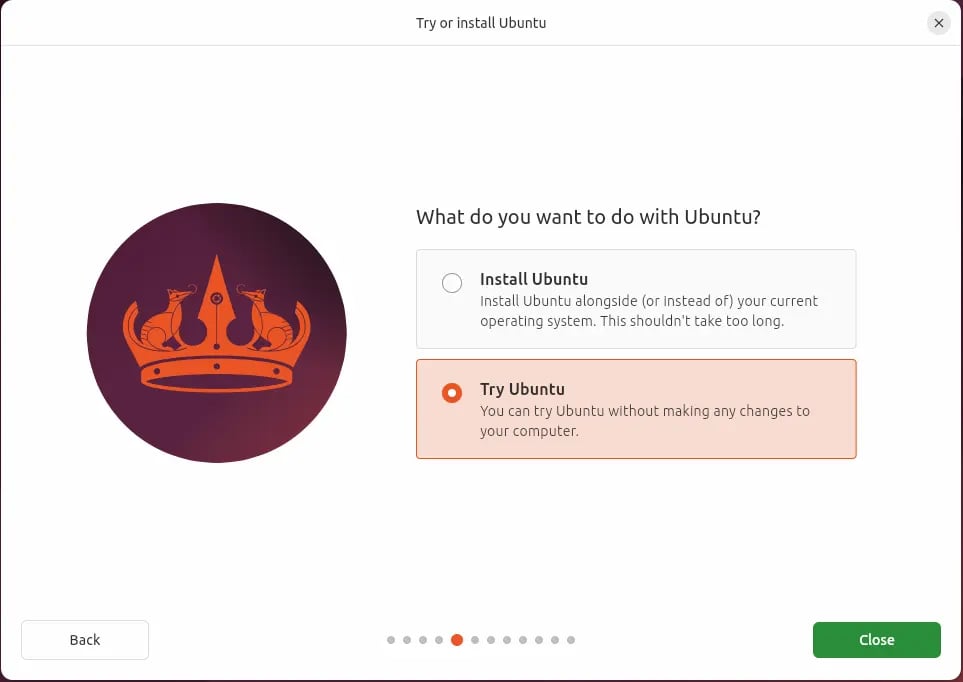
- After booting from the flash drive, you will see the Ubuntu menu. Click through the first screens; we are interested in the one titled - Select the Try Ubuntu option. We are not installing Ubuntu on the disk – we are only running it in RAM.
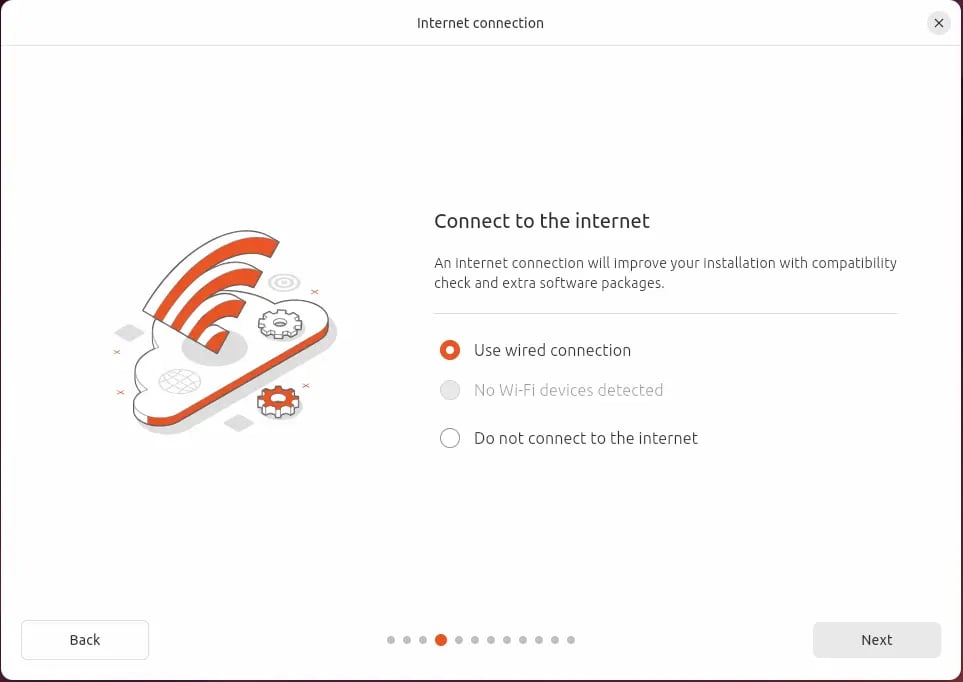
- When the desktop appears, connect to the internet (icon in the upper right corner).
- Open the Firefox browser and go to the page: home-assistant.io.
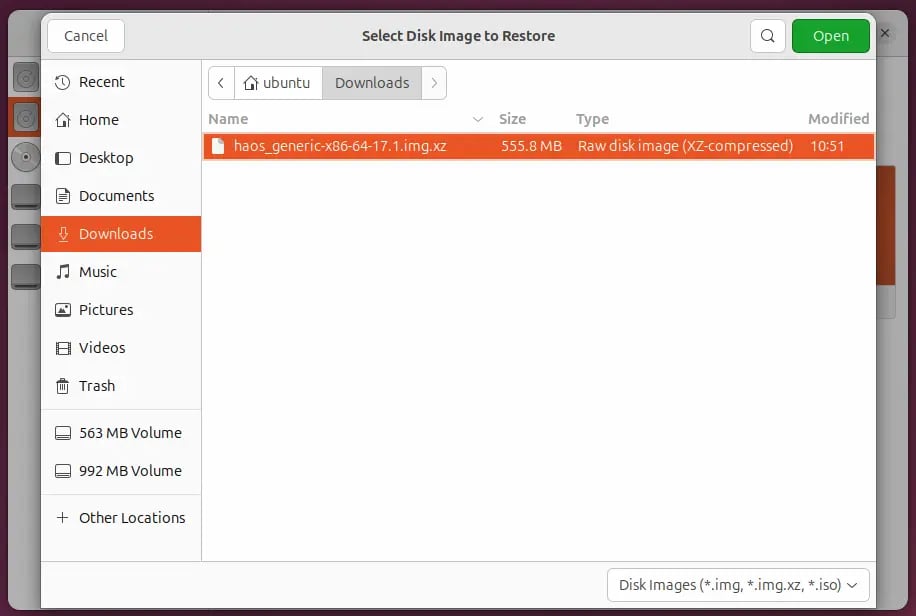
- Find the section with the link to the system image (look for the phrase Getting started -> Installation -> Generic x86-64 "URL to the image") and download the HAOS image (file with the .xz extension).
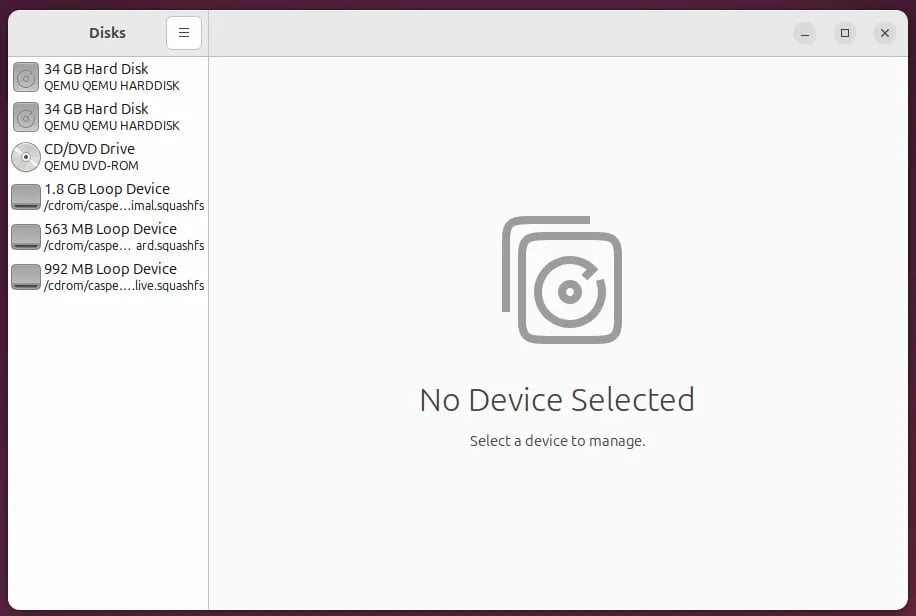
- Click the "Activities" icon (or the grid of dots in the lower left corner) and search for the Disks application.
- In the Disks application:
- From the list on the left, select the server's hard drive (not the flash drive!) on which HA will be installed.
- Click the three-dot icon (Menu) in the upper right corner of the window.
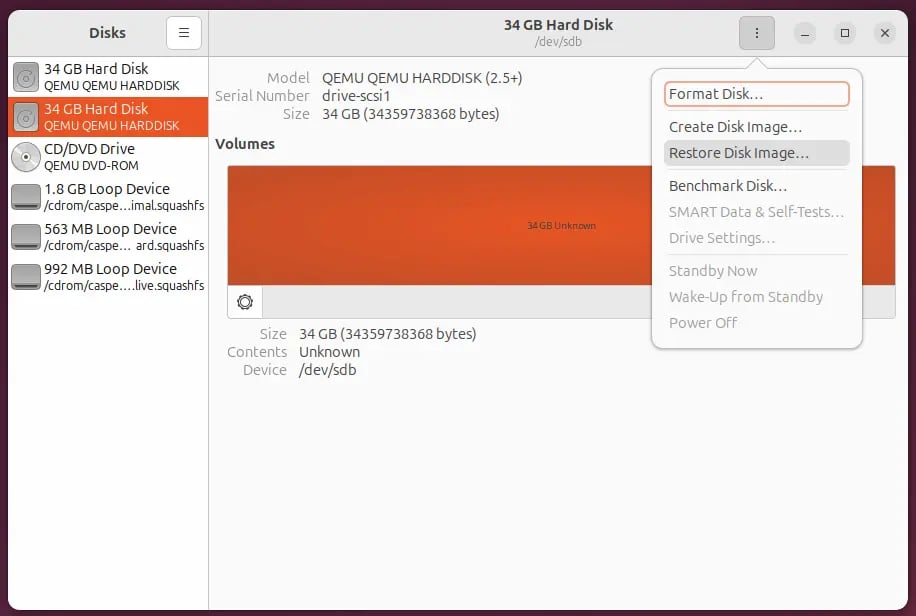
- Select the option Restore Disk Image...
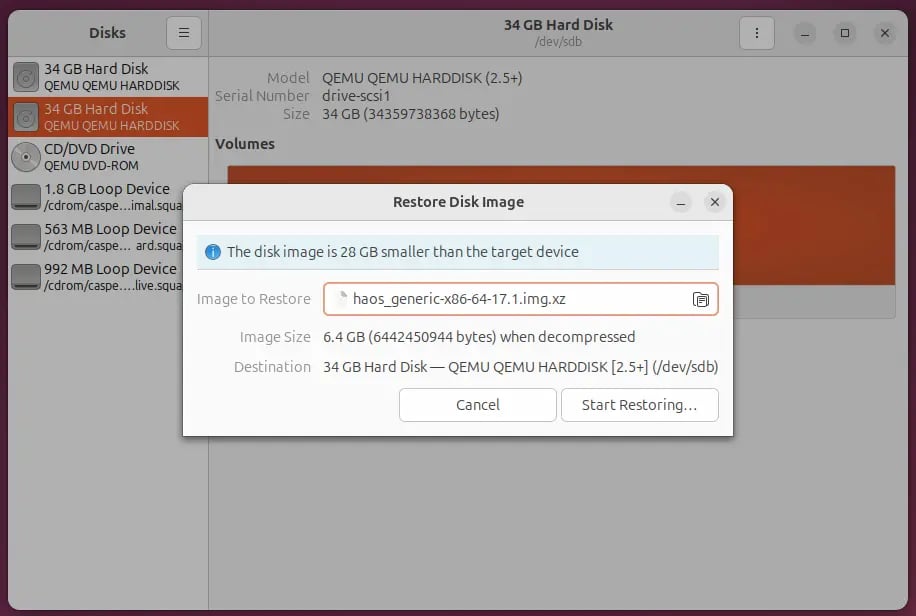
- Point to the previously downloaded HAOS image file.
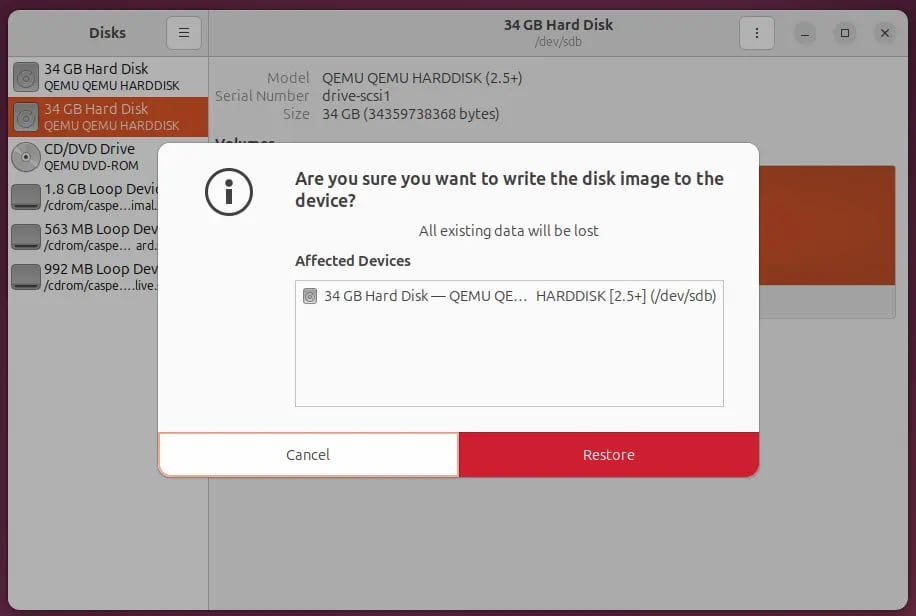
- Click Start Restoring... and confirm the selection. You may be required to provide a password (in the Live version, there is usually none, or just confirming is enough).
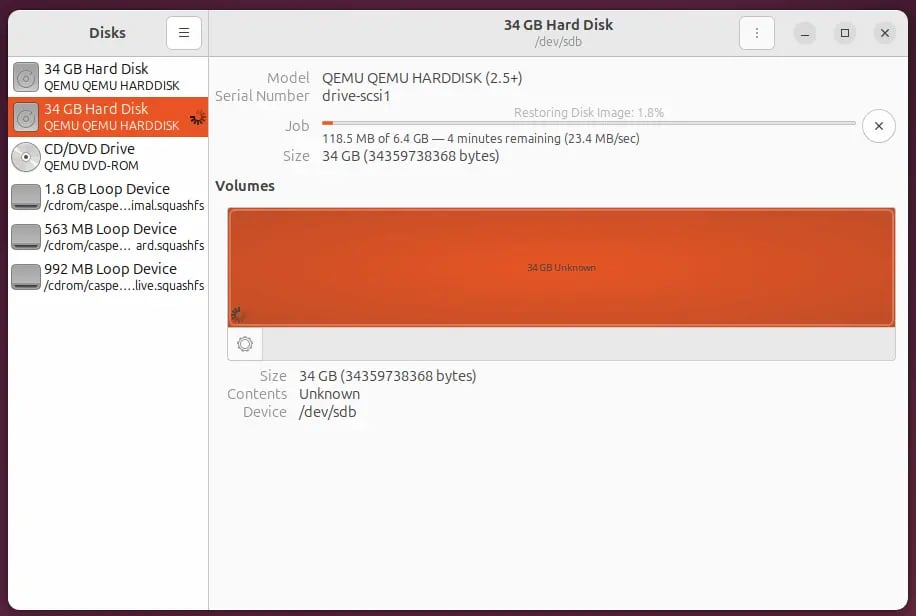
- The process of flashing the image to the disk will begin.
- From the list on the left, select the server's hard drive (not the flash drive!) on which HA will be installed.
- After the process is finished, close the Ubuntu system, disconnect the flash drive, and restart the computer.

https://documentation.ubuntu.com/desktop/en/latest/tutorial/try-ubuntu-desktop/
Step 4: First launch and configuration
Your Home Assistant is now starting from the hard drive. Remember that the first launch may take from several to a dozen or so minutes (the system must download updates and install containers).
- Make sure the server is connected with a network cable to the router.
- On another computer in the same network, open a browser and type:
- http://homeassistant.local:8123
- or http://homeassistant:8123
- or the server's IP address (e.g., http://192.168.1.15:8123).
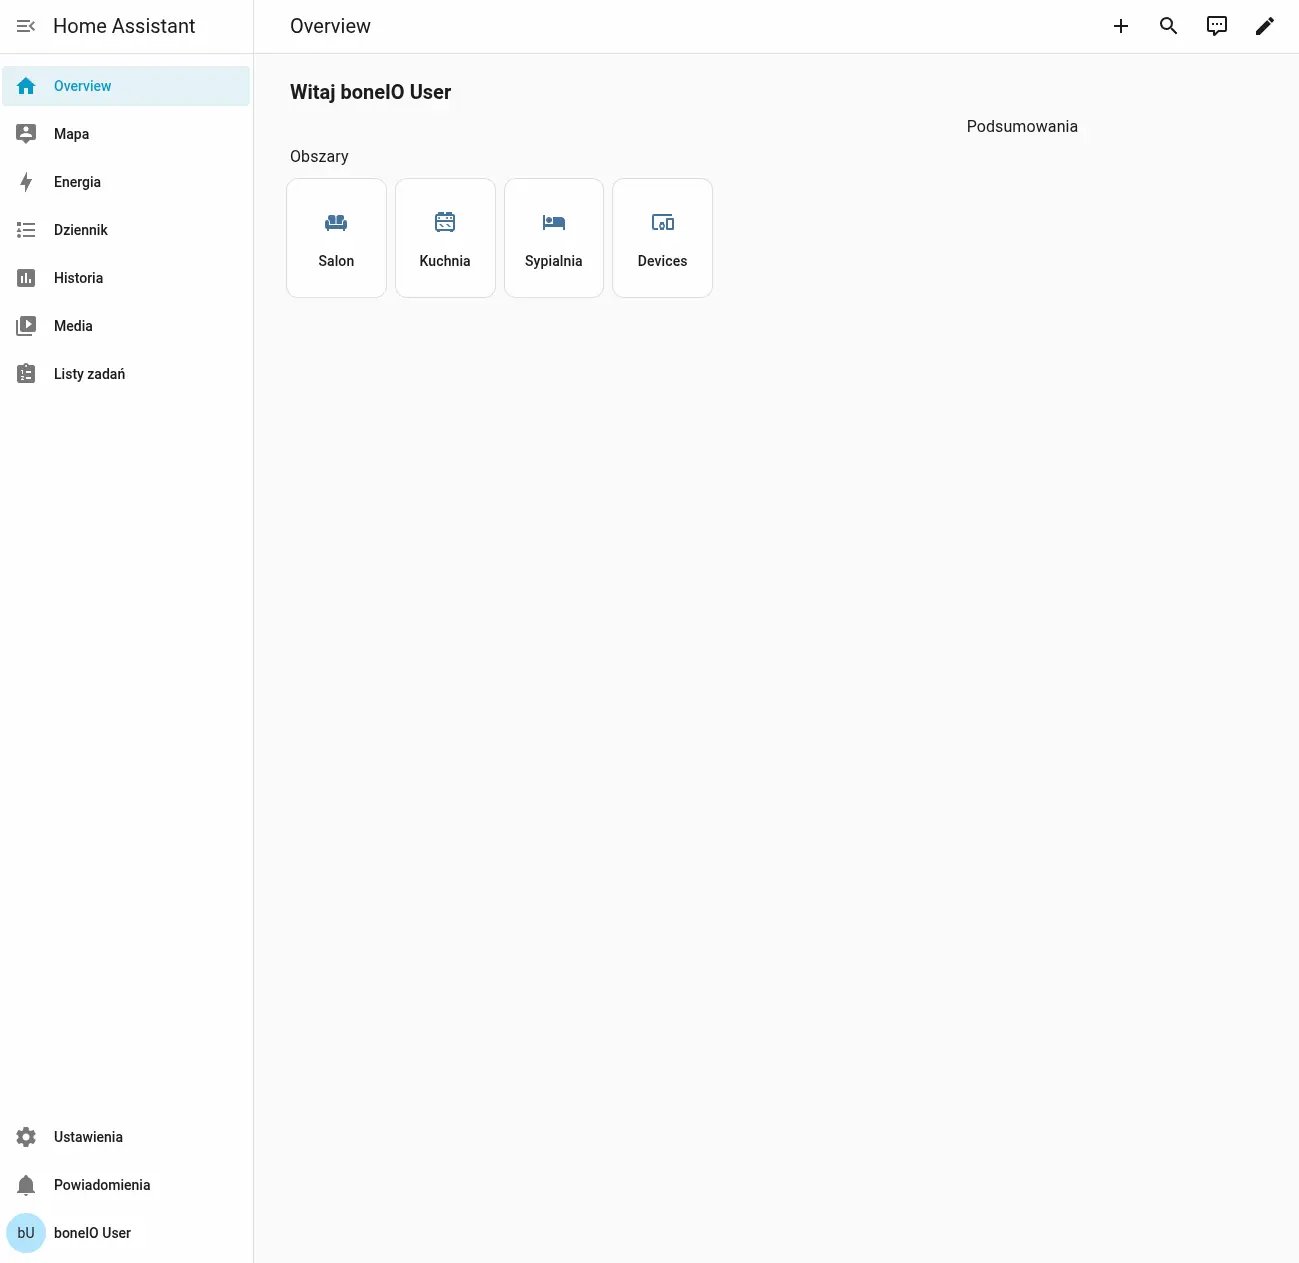
- When you see the welcome screen, congratulations! You have just installed your system.
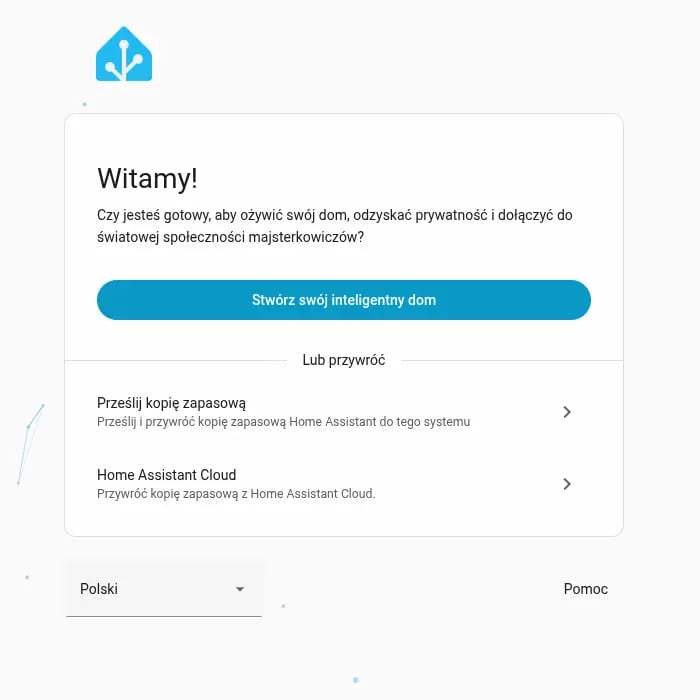
Initial configuration:
- Create your smart home!
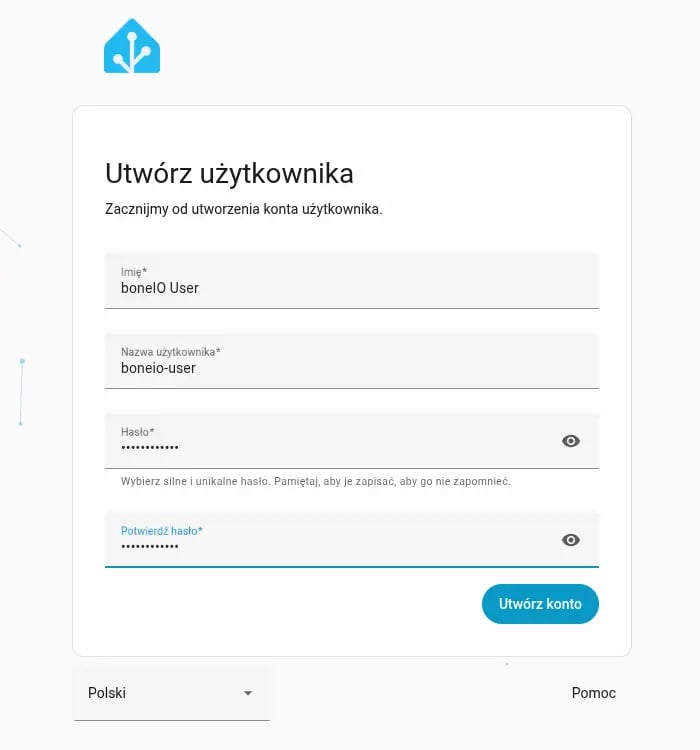
- Create an owner account: Provide a name, username, and a strong password. For the purpose of this guide, use boneIO User.
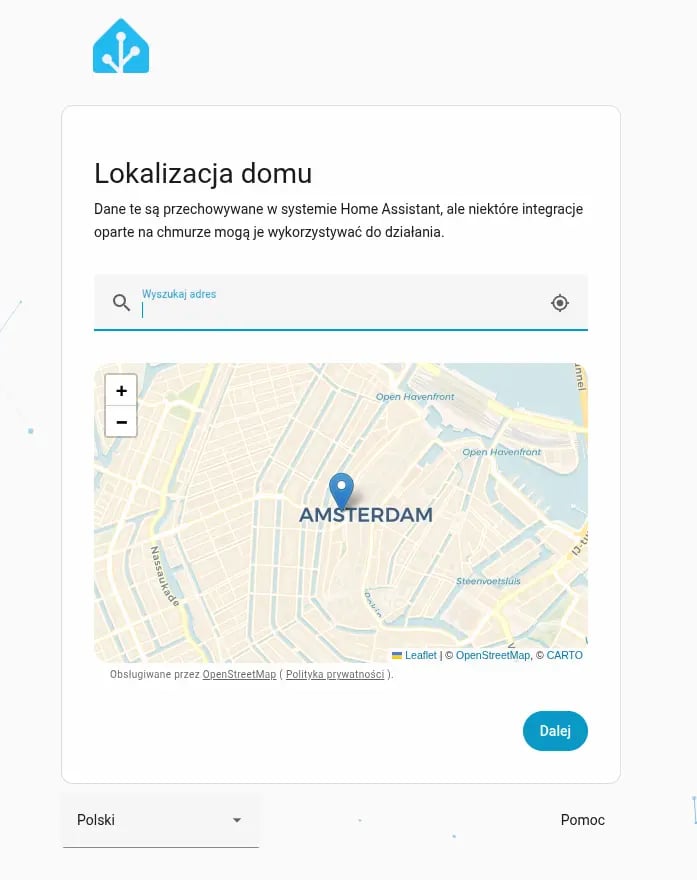
- Location: Set your home's location on the map (this will help with automations based on sunrise/sunset or weather, as well as those based on location tracking).
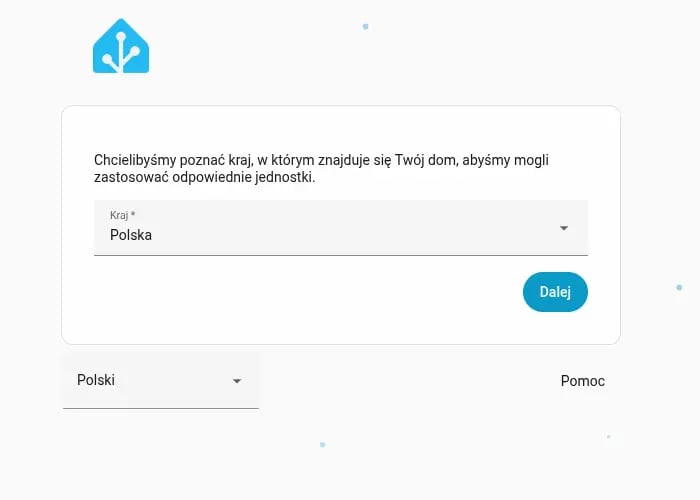
- Country and units: Select your country, currency, and the metric system.
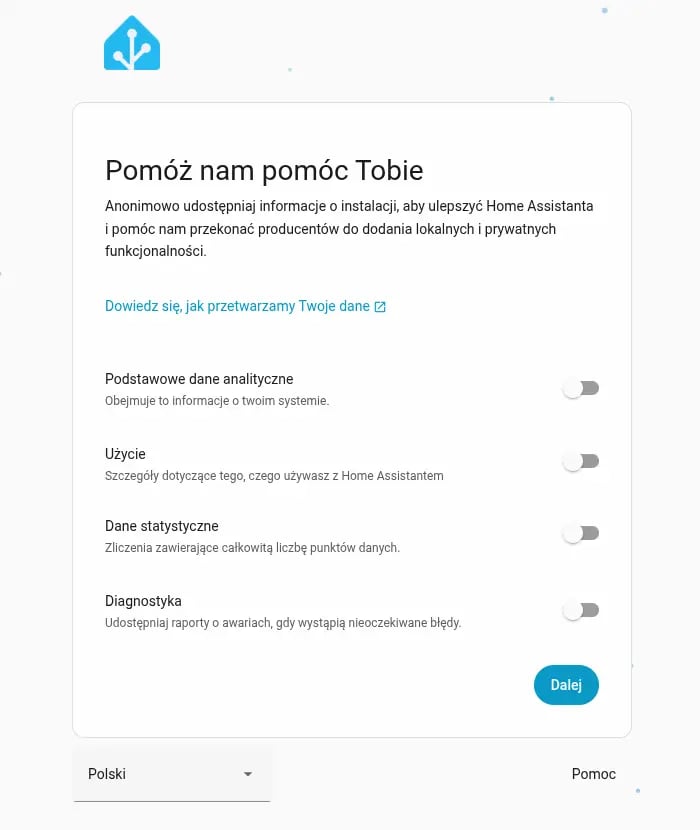
- Analytics: You can select the data you want to share with the Home Assistant foundation (this helps in the development of the project).
What next?
After going through these steps, you will see the main interface (Dashboard). At the moment it is empty, but this is where the real fun begins. In the next parts of the guide, you will learn how to add the first devices, configure the mobile application, and create your first automation!