Connect your boneIO ESP
How to connect to your controller?
Let's install the ESPHome Device Builder!
There are 3 options to connect to your boneIO ESP:
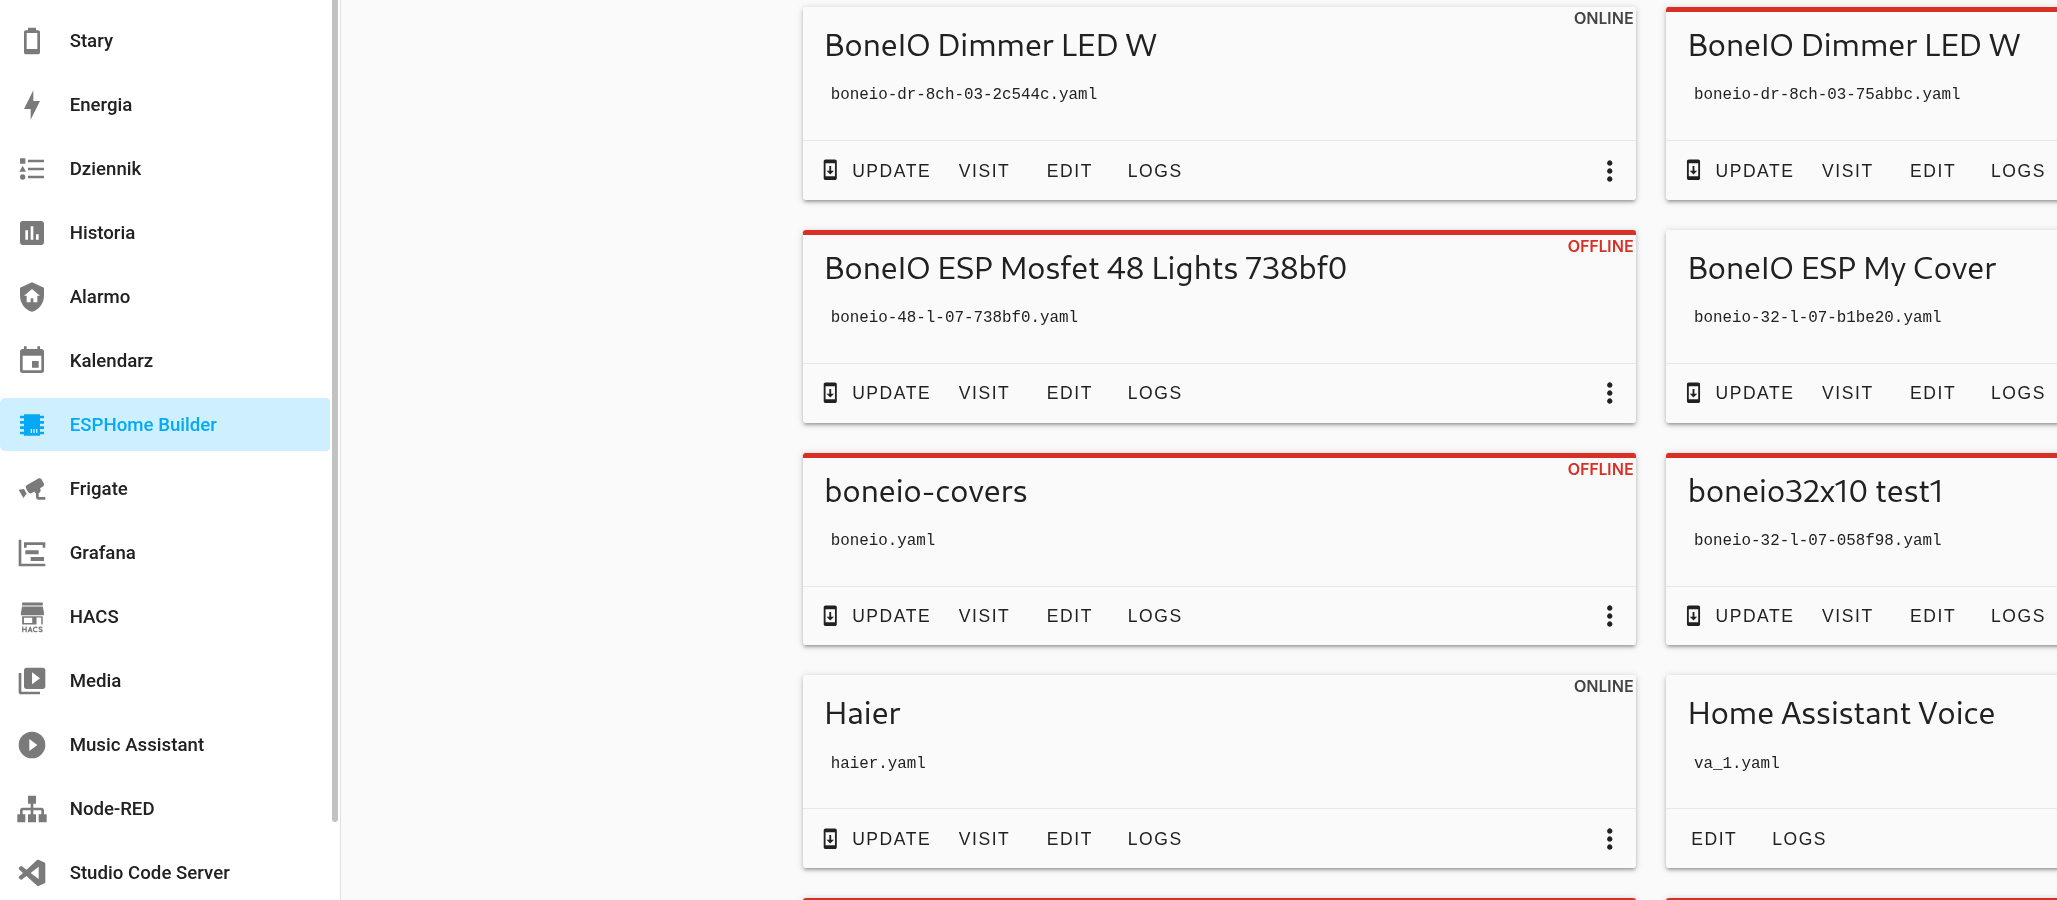
ESPHome Device Builder in Home Assistant
Installing the ESPHome Device Builder add-on is pretty simple. Just follow these steps:
- Go to the Settings > Add-ons section in your Home Assistant.
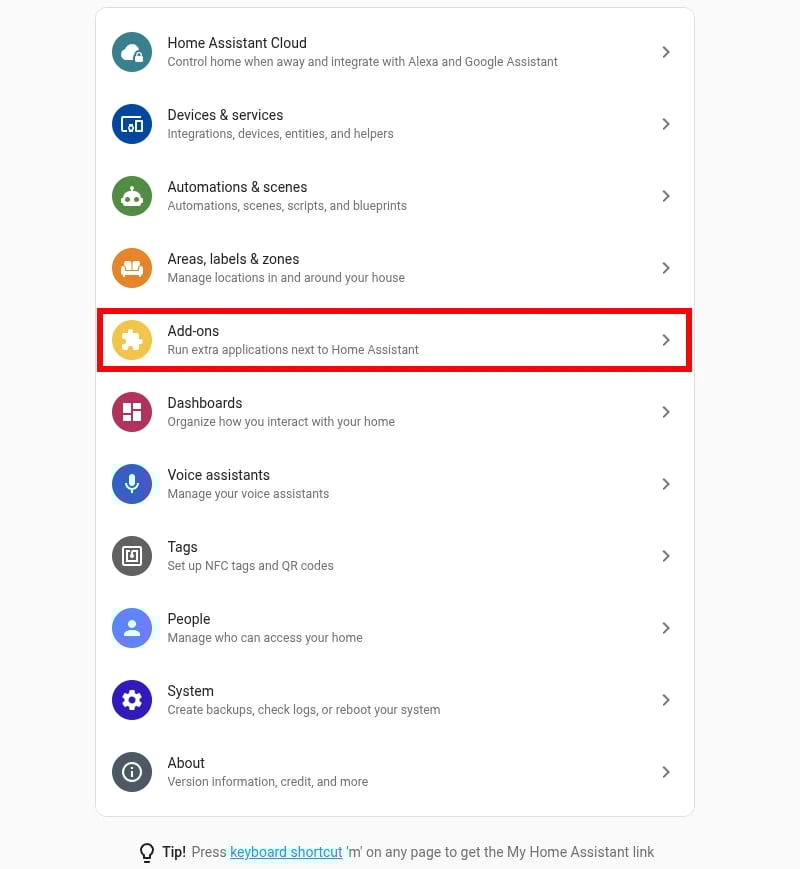
- Click the Add-on Store button in the bottom right corner.

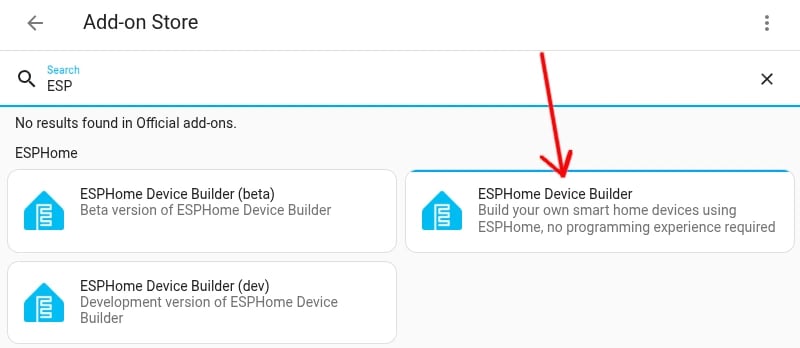
- In the search bar, type
ESPHomeand select the add-on from the official repository. Make sure you don't use beta or dev versions, as they are for testing purposes only.
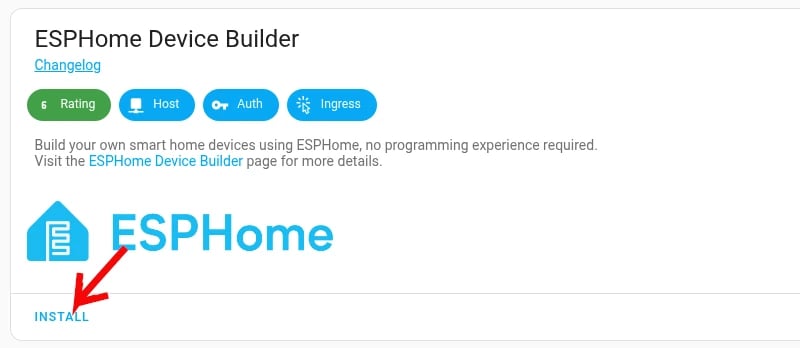
- Click Install.
After the installation is complete, go to the Configuration tab and enable the Start on boot and Show in sidebar options. This will make it easier to access ESPHome Device Builder in the future.
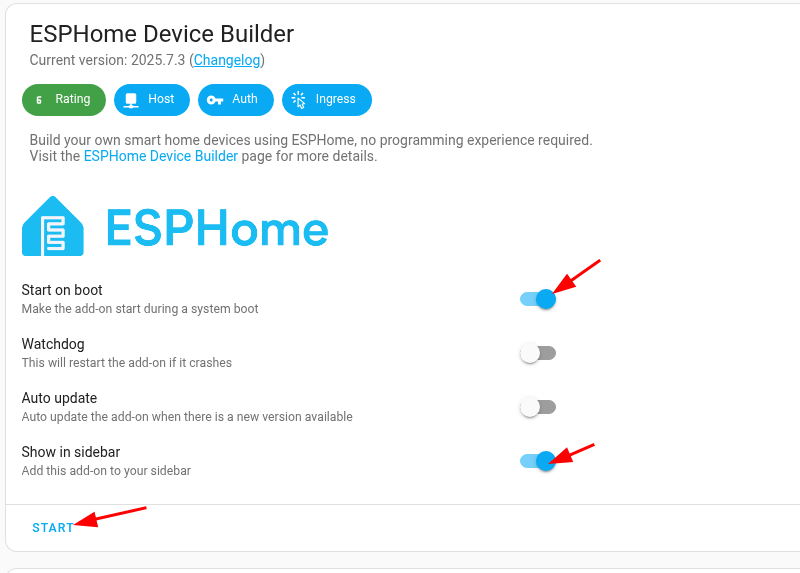
Finally, go to the Info tab and click Start to run the add-on. You will now see ESPHome Device Builder in your sidebar!
ESPHome Device Builder on Your PC
If you don't use Home Assistant (HA), you can still edit your boneIO ESP's configuration.
Editing Esphome config without HA, just on your PC is also possible. Similar instruction is here: https://esphome.io/guides/getting_started_command_line
On your PC, you will need one of the following:
- for Linux: Docker,
- for Windows: Python 3.13 installed.
Windows
We assume that you are running Windows 10 or 11 - its important to have your administrative privileges, also you need internet connection.
Let's do it step by step!
-
Download Python installer from Python download page for Windows Choose Windows installer according to your operating system version (most common is 64-bit).
-
Choose both options available in installer. “Use admin priviliges when installing py.exe” and “Add python.exe to PATH”. Click “Install now”.
-
Verify Python installation Open Powershell or CMD and type:
python --versionIf properly installed output would look like (with your Python version):
Python 3.13.2- Prepare Esphome for Python. In Powershell prompt type:
mkdir $env:USERPROFILE\esphome
cd $env:USERPROFILE\esphome
pip3 install wheel esphome pillow==10.2.0
in CMD:
mkdir %USERPROFILE%\esphome
cd %USERPROFILE%\esphome
pip3 install wheel esphome pillow==10.2.0- ESPHome should work now - lets test it! Do it by typeing:
esphome versionThe output should looks like:
Version: 2025.x.xThe version will differ for you. It's depends on your current version. Now you’re good to execute next steps.
Run ESPHome Dashboard
In powershell type:
cd $env:USERPROFILE\esphome
esphome dashboard .
or in CMD
cd %USERPROFILE%\esphome
esphome dashboard .
Check it out opening page in your web browser http://127.0.0.1:6052 If it’s loaded then you can go to next section: Connect with Esphome Addon or if you prefer USB installation go to USB Only installation.
Upgrade ESPHome
To upgrade your ESPHome in windows you need to:
pip3 install --upgrade esphomeLinux
Fetch Esphome docker image / Linux / Mac OS
Run following command in terminal:
docker pull ghcr.io/esphome/esphomeRun Esphome dashboard Now let’s start Esphome dashboard. Make directory where your config would be stored eg /home/me/esphome
In Linux based system:
docker run --rm --privileged --network host -v "/home/me/esphome":/config -it ghcr.io/esphome/esphome dashboard .Now in Chrome open website:
under Linux http://0.0.0.0:6052/
Connect with ESPHome Device Builder
Note: For this to work your home network must support mDNS. Your PC and boneIO is in same subnet (same VLAN) in most cases it’d work. boneIO has to be connected to your network and working.
- Find your new boneIO device in the dashboard.
- Click Adopt
- Choose name for our new device
- Click Adopt
- Now it will prompt for install new software
- After install there will be logs visible, you can click stop now
It’s ready, you can edit your config by clicking Edit on your boneIO device.
Running boneIO without Home Assistant
If you don’t have HA, then in config find line:
api:and add reboot_timeout: 0s to it, so it’d look like:
reboot_timeout: 0s is default option in our precompiled binaries.
api:
  reboot_timeout: 0s
USB-Only Installation
If you don’t want to setup network in boneIO then go with those steps. You'd need to have Esphome dashboard running. For Esphome firmware installation you’d need internet connection on your PC!
- Go to https://boneio.eu/esp
- Choose your board and choose option "Download yaml for this firmware" in the end.
- In the top right corner choose Download raw file
- Copy it to your Esphome directory eg C:/Users/me/esphome. After pasting it, it should appear in Esphome dashboard.
- Now you can Edit and Install firmware using "Plug into this computer" option. If you need to install some drivers, then Esphome website should show what to download to get it work.