ProductsEdge Temperature & Humidity
Overview and Specification
Precise temperature and humidity sensor. Enables your home automation system to control heating, ventilation, and ON/OFF devices based on real conditions.
boneIO Edge Temp & Humidity
An extremely compact, precise, and reliable temperature and humidity sensor. Ideal for placement in junction boxes, frames, and anywhere an accurate measurement of temperature and humidity is required. Thanks to the use of reliable components, the device measures climatic conditions very faithfully. Due to its very well-thought-out design, it does not distort readings even in "tight" locations – it does not heat up the surroundings.
Key Features
- A wide supply voltage range (5 to 24V DC) means there is no need to worry about voltage drops when powering the device via the "bus."
- Stable and reliable Modbus RTU communication protocol ensures solid data transmission.
- Extremely compact design allows the device to be mounted even in the "tightest" spots.
Application Examples
- Measurement of room temperature and humidity.
- Measurement of temperature and humidity in electrical distribution boards.
- Measurement of humidity in heat recovery (recuperation) units.
- Measurement of humidity in bathrooms.
Technical Specification
| Feature | Value |
|---|---|
| Power supply | 5-24V DC |
| Power consumption | < 20mW |
| Temperature range | -40 to 125°C |
| Accuracy | 0.2°C |
| Humidity range | 0 to 100% |
| Accuracy | 1.8% |
| Communication | Modbus RTU |
| Dimensions (WxHxD) | 33mm x 8mm x 3mm |
| Weight | 2g |
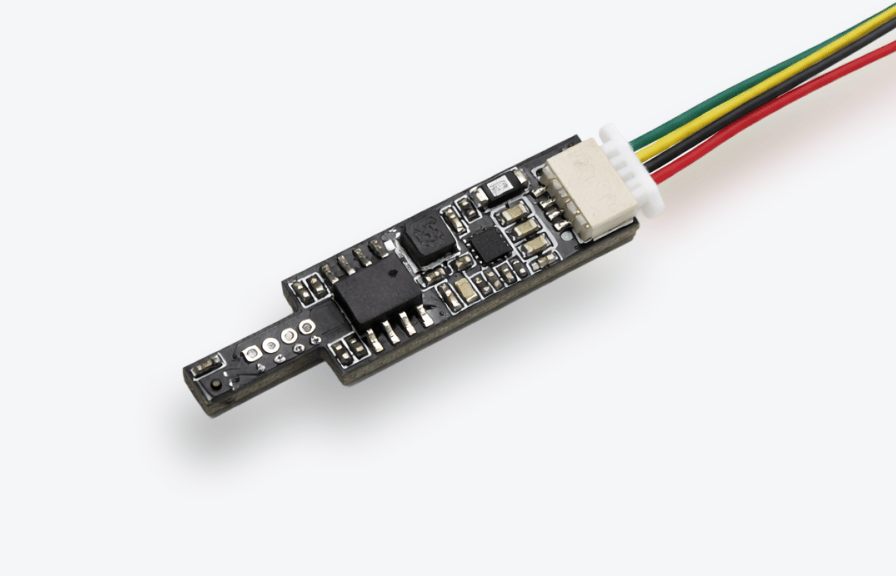
Description of Connectors and Components
- Power and communication connector.
- Red wire + - power supply connection.
- Black wire GND - ground connection.
- Green wire A - Modbus communication.
- Yellow wire B - Modbus communication.
- The device is programmed by the manufacturer. The user does not need to program it. If, however, you want to do it yourself, you have that option. Programming pins. Looking from the narrower part of the sensor — from left to right: 3.3V, Udpi, GND
- LED It is used to signal the status of the device. It can be completely turned off.
Quick Start
- Change the address.
- Device installation - a qualified person must connect the device.
- Configure the sensor.
- Done!